This is our old, outdated site. You will be redirected to our current website in a moment.

Thank you, Thatresourcesite.com

Catechism Lesson - God is . . . Perfect

The Perfections of God Highlighted for Children

As I begin our Religious Education year in the classroom, I always keep in mind the goals set by our Pastor, our DRE, and myself.  There is certain material that must be taught like the Ten Commandments, the Steps to a Good Confession, and the Seven Sacraments, but there is a whole host of less concrete concepts or traditions that can and should be taught as well to prepare children to receive their first sacraments.  As a catechist, as well as a homeschooler, I am often told what material should be covered by our learners to meet learning requirements but how I teach that information, that glorious job is up to me!! :)

I am blessed with the trait that I am easily inspired to move to creative action.  So as our wonderful pastor gave the blessing upon our CCD families, teachers, students, and materials a few weeks ago, the only thing I kept focusing on was the simple sentiment he shared: "Who is God?  Many, adults and children, ask themselves that question."  The Lord had given me the new theme for this new learning year.  It's as if He said, "Explain to the children who I am."  So I am attempting to do just that, with the help of the Holy Spirit, of course. 

Lesson:  God is . . . Perfect
  • God is . . . sign file (as shown above)
  • Fat tipped gold or silver metallic pen
  • Fat tipped coloured markers in various colours
  • Classroom/learning room wall
  • White paper or card stock  8.5x11" - I used cardstock.
  • Tape
  • Scissors
  • Glue stick
  • stapler
  • F3 Folder (See how to make this here) - one yearly for each learner
  • What is a Soul F3 Piece - one for each learner
  • My Book Mini-book on The Perfections of God (link below) - one for each learner
PREPARE

Learners' Thought Bubbles


 The first thing to do is create the sign: "God is . . ."  You can download that sign Here.  It will print out very lightly on the paper.  Print out and trace the letters with gold or silver metallic pen.  Cut out letters making sure to leave metallic pen lines visible.  You may want to go back and highlight the edges of the letters to make it stand out more.
 Next using paper and your different coloured markers, create two big thought bubbles length wise on each piece of paper.  Each bubble should be in a different colour.  Allow one bubble per child for larger classes and two bubbles per child in a smaller classes or homeschools.


Teacher's Thought Bubbles


Create individual signs(bubbles), one each, with the words depicting God's perfections: Eternal, All Powerful, All Holy, All Loving, All Merciful, All Wise.  Add a little symbol to decorate each sign.  Here are my examples:

Eternal  - a circle made out of arrows or a ring
All Powerful - a lightning bolt
All Holy - a pious symbol of a yellow halo
All Loving - hearts
All Merciful - tear drops
All Wise - light bulb


Create a sign the size of a full sheet of paper with the word "Perfect" on it in gold or metallic pen ink.

Arrange the letters to create God Is . . .  on the wall.  Affix with tape.  Each lesson we will merely change the word to describe God.


DELIVER


Ask the children the question, "Who is God?"  Don't be surprised if you get the deer in the headlights look for some.  Expect that.  You may want to give a few little ideas but none of the direct words used in your specific bubbles.  They should be hidden from sight at this point.  Have them face down loaded with tape rings ready to go when it's your turn.

Give each child a thought bubble or two and something to write with and have them finish the sentence God is...  Tell them that you will be finishing the sentence too.  In my class I got responses such as "our father", "pure spirit", and "in Heaven."  Affix bubbles to wall under the sign "God Is..."  Leave room for your bubbles.
When all children have had a turn, reveal your own bubbles.  Explaining each one as you affix them to the wall.  Explain the relation of the symbol to the word.  Orally link any words or phrases that they shared to the bubbles that you shared.  Affix your sign with the word "Perfect" to the end of the sentence "God Is..." on the wall.

To finish off this portion of the lesson link and explain how we as children of God with a soul are similar to Him.  (We can show mercy. We have eternal life and so on.)

Complete the "What is a soul" F3 piece and affix in the F3 Folder.  (Download and see how to make this here.)

Begin My Book Mini-book The Perfections of God.  This little prompted mini-book reviews today's lesson.  It can be completed with writing, drawing, or a combination of both.  Those who finish can assemble by cutting out pages and stapling them together in order.  Glue into F3 folder where you think it is appropriate.  If not completed, have children finish for homework and bring back to class to be assembled and affixed into F3 folder.  All children should affix it in the same spot to keep folders consistent.


Blessings,
Kalei - That Resource Team


Resources to Celebrate the Feast of the Archangels - The Transcendent Trio

Get to know our angelic helpers - St. Michael, St. Raphael, and St. Gabriel - The Transcendent Trio on their feast day.

Learning about the Archangels is always neat and enlightening for children as well as adults.  Today we offer a few helpful and fun resources to highlight this special occasion.  These resources could be used at home or class today or anytime during the year when they are mentioned in your Bible study.


Find out about the Transcendent Trio by name, what each name means, and when to call on them for intercession using our fun Saint Trading Cards.  These cards are inexpensive to make and very colourful.  Cards print four to a sheet for convenience for families, classes, and CCD use.  Simply print out, cut apart and glue.  You can laminate them and put them on a key-ring for fun and easy reference.  You will find our entire collection at the link above.  We have received requests for some new modern saints, so visit us often over the next week or so.  New cards are on the way.

Cut and Paste Activity on the Angels and the First Sin
This link will take you to a fun rebus style activity comes to life with its cut-n-paste design.  The story of the first sin is told in an easy to understand format.  The CCC reference as well as an answer sheet is included.  This sheet and other activities on this page from our resource site focus on the ideas of sin and forgiveness and were created for my CCD class use.


Little Lesson on the Archangels by Michelle Scott
Although we've mentioned this resource earlier in the month by Michelle Scott over at Thinking Love, No Twaddle, today is one of the day's to really pick it apart and have some learning fun.  This Liturgical Lesson for September on the Triumphant Cross and the Archangels is well done and great to do as a family.  You will find this as well as all of Michelle's contributed Little Lessons at the link above.


Have an angelic day!

Blessings,

Kalei - That Resource Team

Welcome Fall with Fun Seasonal Themed Learning Resources


Autumn Harvest Graphing Game
 Let the fall fun begin with bright fun themed printables and games.

Fall is one of my favourite times of the year.  Why?  Of course there are the big traditional reasons of celebrating Thanksgiving, All Saints Day, Remembrance Day, and the beginning of the liturgical season of Advent, but there are also lots of little special things that make this season so memorable.  Like many Canadian families we enjoy canning fruits and veggies, waiting for the first frost to signal putting away the lawnmower, anticipating the first snowfall, lighting the first fire in the fireplace, and of course, watching hockey!! (Go, Canucks, Go!!)  But fall is special because it is a distinct reminder of God's glory in action.  Having grown up in the tropics, I only studied about the pronounced seasonal changes that many people take for granted.  It wasn't until I was an adult that I truly stared in awe at bright red maple leaves that were just green a few days before and thought to myself in childlike wonder,  "Wow, this is the most beautiful thing I have ever seen."  (This was, of course before I saw my first snowfall..lol.)

The resources we highlight today were all inspired by my love of fall and all the richness that comes with this season.  We hope your family of learners finds them fun too!!  Click the resource title to find these resources and others like them from our main resource website.

Fall Chore Chart
Use these cute chore charts to help children remember daily or weekly chores.  This resource is only available in a blank form, in two themes.  These sheets can easily be laminated and used daily or weekly over and over again using a dry erase pen. You will also find other themed chore charts at this link.


Apple Counting Fun
 Apple Counting Fun
Younger learners can practice simple counting skills using this cute and colourful fall themed worksheet based on a favourite fall fruit, the apple.  This sheet is very appealing to new writers and the Pre/K-Gr.1 age group.


Use fall harvest foods to practice the mathematical skill of using a bar graph.  Available in two skill levels, this simple to make and fun to use math game can be used over and over.  Non-readers can enjoy this game too. 


Fall Leaves Nature Page
In our collection you will find apple themed pages, falling leaves themed pages and more.  These bright cute and unlined pages remind us that fall is definitely here.  Use this page for nature walk and study notations, writing, drawing or any combination learning activities.  These are perfect for Charlotte Mason style learners.  You will find many other themed nature notebook pages at this link.


Fall Assignment Sheet
Help make everyday sweet learning fun with this checklist style fall fun learning assignment sheet.  This theme is available in blank as well as pre-filled subjects (like the example at left).  These sheets help learners to stay organized while accomplishing tasks daily or even weekly.


Virtue Incentive Sheet
 Our Virtue Lesson on Thankfulness
As Thanksgiving is coming up in a week or so here in Canada, we thought you may want to begin thinking about using Our Virtue Lesson on Thankfulness as your focus for October or November.  Our Virtue Lessons are fun, easy to use, and very well received by homeschoolers and other educators as well.  We have tried to include everything you would need for a gentle month long study of the virtue of Thankfulness.  Find our core sheets to help define the virtue and give examples of the virtue in action, our printable prayer card, Aesop's Fables and copywork, scripture passages, a light reading list, worksheets, certificates, projects, incentive sheets, mini-posters and more.


I hope you find these resources helpful this fall. :)

Blessings,

Kalei - That Resource Team

CCD Lessons - Church Tour and Sacramentals Resources For Fun and Learning


Side Altar Honouring our Blessed Mother
Get to know God, by learning about His house and Mass tools.

As I kick off a new CCD teaching/learning year, I thought that I would take you along on our weekly journey.  I will share lessons, resources, and ideas as much as I can in the hopes of helping other catechists or parents who choose to prepare their children for the sacrament of Reconciliation and First Eucharist outside a formal parish program.  As our CCD program meets weekly for 75 minutes, we are limited in what we can accomplish with the children.  Once a month we meet in the church instead of our classrooms for special prayer time and presentations.  For October we will be having our annual church tour.

The church tour is very special for the children as each class not only goes through the church building itself, including all the nooks and crannies, but they also get a special tour of preparation for Mass including in introduction to vestments, a bit of church history, a chance to touch the Chalice, altar linens, and thurible, smells the oils and incense, examine the tabernacle, learn the history of our church relics and so much more.  It is such a wonderful evening and one of my favourite nights of the year.

To help my children stay a bit focused, I made a fun and simple Mass Tour worksheet that I attach to a clipboard and have them take on the tour.  I put a medium sized pencil on a string and tie it onto the clipboard as well.  As we go around the church, the children fill out the sheet.  Our sacristan, who presents all of the information for the Sanctuary and serving tools, teaches to the sheet which is very helpful.  Children are allowed to ask questions and many oooohhs and aaahhs are always heard.

From every class period then on, I use the following resources to keep the tour information fresh in their hearts and minds.  Of course I always encourage Mass attendance to see how each of the tools is directly related and used to celebrate our Catholic Faith.


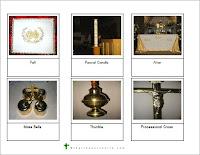
Church Tools and Article Games can be printed here in both colour and b/w.  These use pictures of articles directly from our parish.  These are great for class play and review.  I have used these for years and once laminated they can be used year after year.  I prefer to use 3mil, heat laminated covers for these game pieces.  Parents may even want to make sets for home use.  It is hands on, Montessori style learning that ALWAYS brings smiles and fun.  parents can learn lots from playing these games with their children too.  To play, simply mix up and match word to picture in concentration or go fish style, call out words and have class teams find the picture.  You may set up a few matches with one that contains an incorrect pair as an alternative method of play as well.  Sometimes teams will try and trick each other too.  Kids will come up with great ways to play games if you are just open minded.


Some pictures used in our matching games are also available as Montessori sets here.  They are easy enough for families to make at home or teachers to print off for children to use in class activities.  You will also find other sets for Catholic instruction including Sacramentals, Stations of the Cross, and more.  Using heavier bond paper or laminating plain paper adds to the longevity and durability of the cards, especially if you have a larger class.


Sacramental Themed Calendar pieces

Reinforce church articles using our specially themed over sized monthly wall calendar.  Create the board, laminate the pieces and use mack-tack or even Velcro for ease.  Once this project is laminated, it could be used month after month, year after year.  I like to use the 5mil, heat laminated style products for this project.  See this and other themed calendars here.  These are always a hit with children. 


Another nice thing I use is a beautiful little video we made this past year using pictures of our church and music from a gifted musician from our parish named Keith Philips.  He wrote the song and lyrics to this song inspired by the work of Blessed Mother Theresa.  It is just perfect for children.  You can learn more about Keith here and listen to his entire album at no cost.  The video is great to reinforce different parts of the church and sacramentals found in it. 


If you have never considered having a church tour as part of your CCD year, I highly recommend it.  If you already do one, consider continuing the learning for review and fun using some of the resources mentioned above.  Have a blessed learning year.

Feel free to contact me with questions or comments via our website here.

Blessings,

Kalei - That Resource Team

How to Make Our F3 Folders

Finally..Here's how to make our F3 Folders that are made to fit 3-ringed binders.

So, we know F3 is a strange name but it really is about the 3 Fs to do with the folder - flip, flap, fold.  Now lapbooking is neat and cute and very warm and fuzzy and I know people who do GREAT and extravagant lapbooks.  Unfortunately for us, it is way too much of a task for us complete a lapbook project at once.  The kids get overwhelmed by the sheer number of pieces in most premade packets.  They often get tired of the topic or the tediousness required to make all of the pieces.  Many times our kids want to switch to notebooking part way through a topic or use some of our own worksheets or resources.  We found that just a few pieces are often enough for us and many times we like to incorporate the piece directly into a little lesson type worksheet that then needs to find a home.  Some lapbookers can be bit of purists and feel that worksheets shouldn't really go into lapbooks.  We did not want to limit our children's learning activities to what could be pasted into or onto a file folder and we wanted everything we used - notebooking sheets, cut-n-paste activities, handouts, worksheets - to be kept in one spot and be able to be placed neatly on a shelf in a normal position.  Thus the F3 Folder was born.

This post explains how to create these folders in detail.  They are neat and fun to use but they do require a bit of work and a touch of patience to make them initially.  Once you get the hang of it, it's easy.  I usually make a whole pile at once.  (I even use this style of learning in my CCD class.  I will share more on that in another post.)

F3 Folders are made out of two manila folders, connected together especially designed to fit in a 3-ring binder. The folders extend out of the folder while still contained in the rings and can always be added to with more folders to accommodate any project including timelines. No more trying to find homes for odd-shaped paper projects or even storyboards. We like to use folders of various colours for different months projects, subjects, or topics and we are never afraid to have a few going at once..lol.

Note: We have found a bit of variation in folder sizes (measurements) from brand to brand and style to style.  **Remember the old rule, measure twice and cut once. 

To create our F3 Folder you will need:

  • 2 - letter size (8.5"x11") manila file folders (Placement of tabs and folds may vary from below according to brands or varieties.)
  • clear packing tape (with a cutter or on a tape gun for ease)
  • paper cutter with ruler
  • 1 - 3-ring binder
  • a pencil to mark with
  • a ruler - if your cutter doesn't have one
  • 1 - 3 holed punch
Here is a general overview graphic.


Step 1: Keeping both folders closed and the tabs to the left, mark and trim off 1/2" from the bottom of both folders. Make sure that you cut both folders facing the same direction with tabs to the left.


Step 2: Select one folder to work with. Keeping the folder closed with the fold to your left, trim its closed width to 7 3/4".
Step 2

Step 3: Select the second folder. Measuring carefully from the outside centre-fold, trim the right side from the fold to 7 3/4" and the left side from the centre-fold to 8 7/8". (See graphic above.) When closed, the top flap of the folder should appear shorter than the bottom. You will end up cutting off the tabs.
Step 3


Step 4: Continuing with the same fold, using your 3-hole punch, carefully punch holes on the edge of the flap that measures 8 7/8".  (Again, see graphic above.) It will be the side that goes into the rings of the folder. 

Step 4

Step 5: Open both folders out flat with the insides facing toward the table. Match up the sides/edges measuring 7 3/4" and tape them together on the outside using clear packing tape; using a helper can make it a bit easier.
Step 5


Step 6: Fold up folders with the outside flaps together and put into your binder. If more space is needed for projects simply tape on another folder like that used in Step 2. [We have used a total of three folders accordion folded before and have had joyous results.]

You can now affix your F3 Pieces to your folder on the inside of the folders. It is always easier to affix things with the F3 folder inside the binder but if you prefer to affix things with the folder say, on a table, make sure the holes face the left side other wise pieces you glue in may appear upside down. Worksheets and reference sheets can fit into the F3 folder in-between the folder flaps. They close up quite nicely and keep like themed resources together.
Step 6

We hope you find this project helpful and useful.  It is a great way to keep all kinds of topic resources together.  You may find that your first folder may not come out exactly perfect.  Ours didn't either..lol.  But, it really is worth the effort to have projects kept neatly on a shelf and everything kept together for future reference and keepsake browsing. 

Blessings,

That Resource Team


Some Little Latin Lesson Worksheets

Fun worksheets help learners build their skill and love of the Latin language.

We study Latin in our homeschool and it has brought us a greater appreciation of the Bible, the Holy Mass, and the writings of many of the saints.  One of the biggest problems, however, is finding fun colourful resources to reinforce basic Latin concepts and lessons and oh yes, have them also be free of charge.  So we are so grateful that Michelle over at  Thinking Love, No Twaddle has made a beginning set for us.

This set includes four pages and goes with lessons 1-12 of the book Getting Started With Latin, Beginning Latin for Homeschoolers and Self-Taught Students of Any Age by William Linney.  The pages are bright and fun and is an easy reinforcement to the basics of the book. 

If you have never explored this resource, it may be worth a look for you and your learner as it truly is a unique approach to learning Latin. I was just perusing a very nice preview of this book from his website. You can take a look at it here for yourself.  Unlike many other programs (of which we have tried), this book covers only one new thing per lesson.  No struggling with word endings while trying to learn new vocab and sentence structure.  And best of all the author provides a wealth of free audible resources from his website including pronunciation files, Latin expressions, topical lectures and more.   This is worth a peek if you are looking for something broken down a in a bit of a more Classical Learning style.  These worksheets are a great complement to this program or they can be used with any other program for review.


I hope you find these sheets useful and thank Michelle for her wonderful efforts, as always! :)


Click Here to download this Latin worksheet set now.


Blessings,

Kalei - That Resource Team

Keeping Your Learning Goals on Track With Goal Oriented Teaching

Help Organize Your CCD or Homeschool Year with Goal Oriented Teaching

As we begin a new CCD year or home learning year, there is so much to think about.  Resources, supplies, schedules, meetings - there are so many details.  But, one of the most important things to keep in mind is what you want your learners to actually know by the end of the year.  Goal oriented teaching can work for many different teachers (and learners).  Goal oriented learning takes the pressure off the textbooks and curriculum and puts the joy back in learning.  As goals are met using various selected resources, progress is made and learning is enjoyed.

Each year as I prepare for my CCD class I print out a few key organizing sheets.  I use a yearly calendar in portrait form to put in my three ringed binder.  I like to use our Angel set personally.  You can find all of our printable calendar sets here.  Opposite to my calendar, I always put a Goal Oriented Monthly planning sheet for one singular subject; in this case, it is my CCD Religious Education class.  It lets me see my plans for the week and month including a space for a weekly focus, date, hands-on learning opportunity, and reading or assignment box.  This is simple but very effective especially if you are the kind of teacher that likes to or is willing to explore rabbit trails - little tangents - in your learning.  Find this resource here.


I use this layout to keep things organized but also to help keep things flexible as well.  Sometimes the learning pace needs to be adjusted to meet the needs of students, weather (we get snow days here :), or the liturgical calendar.  I would hate to miss a teachable moment because I was locked into a rigorous schedule.  You may forget a feast day or the Parish Mission or Penitential service may need to be added into the schedule, etc. Being flexible and goal oriented can not only keep you on track, but keep you feeling positive as well. 

If you like a block style calendar with goals then this layout may work a bit better for you.  This is not subject oriented.  You fill in the days and then assign your goals on the right by week.  This is great for scheduling in special church functions, guest speakers, saint feast days, class experiments, youth meetings or anything else that you may need to remember at a glance.  Find this resource here.


If you are looking to help your learners stay on track with assignments and tasks, then these check-off style sheets can help keep them working toward a goal in a manageable way.  These could be used for each class meeting or perhaps for the month, or even for the year.  I once used this sheet to track the entire year's reading goals.  I suppose it is like a homework sheet but when you call it a "goal" it seems more purposeful to learners. We have a nice selection of religious sheets as well as other themes.  And yes, we will be adding more themes throughout the year and trying to finish off the Rosary Collection.  Find these resources and other themes here.


I hope that these sheets help you prepare for your learning year in your living room or CCD Classroom!! :)


Blessings,


Kalei - That Resource Team

Our Lady of Sorrows F3 Piece

Introduce your children to the Seven Sorrows of the Blessed Virgin Mary, straight from scripture!!

September 15th is the feast of Our Lady of Sorrows.  Today we offer an F3 Piece on the Seven Sorrows of the Blessed Virgin Mary.  This activity is a wonderful go-along activity for our Little Lesson on Our Lady of Sorrows by Michelle Scott or any Faith notebooking project, CCD class or feast day celebration.  In order to complete this Flip, Flap, & Fold  Piece, children will need to prepare the pieces, look up some scripture passages and match religious images to the passages and titles.  It is easy to complete and requires scissors, glue, our file, and a Bible.  Older learners could complete this project on their own taking about 30 minutes or so, but it is a nice family activity as well.  This really is a great way to practice using the using the Bible while finding concrete examples of our Catholic Tradition in our Lord's word.

Here's what to do:  First cut out all the pieces on the lines as directed in the instructions on each sheet.


Next look up the scripture passages in the Bible.  Match the scripture pieces to the appropriate pictures and glue them onto the proper numbered sorrow piece in their designated spot.


Create the pocket for the completed pieces by folding as indicated on the pocket sheet.  Be careful to fold the flaps all in the same direction and glue only where indicated.


Finish off F3Piece by assembling and gluing piece into folder, notebook, project, or onto cardstock. 


We hope this helps to bring some fun into your day while teaching about some of the most core beliefs and traditions of our rich Catholic Faith.

Click Here to download this F3 Piece Devoted to The Seven Sorrows of the Blessed Virgin Mary.


Blessings,

That Resource Team

More Resources to Help Learn About St. Jerome

Go-Along resources to celebrate St. Jerome's Feast Day on Sept. 30th

We love St. Jerome.  And as we previously shared a wonderful Little Liturgical Year  for September resource featuring St. Jerome from Michelle Scott, we thought we might highlight a few other resources that you can use as go-alongs to learn about this great saint who all Christians owe a debt of gratitude.

Use our Notebooking Sheets to find a set of 12 sheets in various line spacing options for St. Jerome - including spaces to draw as well.  You might also like our plain saint bio template fit for any saint instead.  You may also find sets for some of your other favourite family saints there too.  There is something for everyone.


If your learner is more tactile and a hands-on type learner, then you might choose to make a Learning Card about this saint (or other favourite saints) to add to your collection or to start a collection if you haven't done so already.  Our kids love these cards.  This set includes two saints celebrating feast days this month, St. Jerome on the 30th of September and St. Vincent de Paul on the 27th day of this month.


You can focus a bit on writing and copywork skills with our Saint Quote Copywork sheets.  These sheets are available in cursive or print trace styles although a few other saints can be found in non-trace styles as well.  You will find one of the most famous quotes from St. Jerome available to help celebrate his feast day.


If you are doing a lapbook or other paper project and are looking for a mini-book on St. Jerome, then look no further.  We have a My Book Mini-book on St. Jerome as well as tons of other saints.  These are all prompted for easier narrations. 


If you are inspired by St. Jerome as a Doctor of Catholic Church, you may want to try our My Book Mini-book unit study All About the Saints of the Catholic Church.  This project uses our mini-books to study about many well known and some lesser known saints of the Catholic Faith including books that focus on the Doctors of the Church.  A full list of the Doctors and instructions are included.


Enjoy!!

Blessings,

That Resource Team

Little Litugical Year For September - St. Jerome

Worksheet Pack to Teach About the Transcriber of the Bible, St. Jerome

September is a great month to get children inspired and excited about reading the Bible.  St. Jerome's feast day is the 30th of September.  He was an amazing hardworking saint credited with painstakingly copying God's word from many different languages into the common or Vulgate Latin version of the Bible.  Many people thought him to be quite grumpy but that thought never even entered my mind.  If you have ever done graduate work, you know about the tediousness and accuracy that is required in a thesis or dissertation.  Now imagine doing work a hundred times more meaningful, under pure obedience, on a document that would become THE most important book in history!  Yikes!!!  I'd be grumpy too - oh, the sheer pressure of it all.  Yet, St. Jerome did an excellent job.  So much so that he became a Doctor of the Catholic Church.

Today we offer a neat 3 page resource pack about St. Jerome created by Michelle Scott over at Thinking Love, No Twaddle.  This is a set includes great info about this saint, a chance to practice using the Bible while a little Latin is learned as well.  There is even copywork included.  Concise, accurate and bright, this is a great way to introduce the Bible to children through the eyes of St. Jerome.

Click Here to download this Little Liturgical Lesson on St. Jerome.

Don't forget to mark the 30th of September on your Calendar and experience the efforts of St. Jerome by reading the Bible that day.

Blessings,

Kalei - That Resource Team

The Beauty of Prayer Copywork and Prayer Resources

Prayer Resources to Use for Copywork

If you are a Charlotte Mason style learner, you are all too familiar with the idea of copywork.   Copywork is simply when you have children imitate and copy letters, words, sentences and then paragraphs to learn handwriting and content.  Copywork can start out with letters, numbers or words.  We have many worksheets that have been requested that are based on this concept.  Children start off tracing and move forward to independent writing.  This process can sometimes be repeated when cursive writing is being learned.  However, many families may not realize the beauty that this little charming gem can provide to their children's spiritual growth.

I recently received some beautiful copywork from one of my children for my birthday.  It was the prayer taught to us by the angels, the Hail Mary.  It was beautifully written and decorated in a way that was fit for our Holy Mother.  Then I received a copywork book mark with a mini-holy card of our Lord Jesus as the Good Shepherd on the front and a great matching Bible verse of John 10:27-30 on the back.  Again is was lovely and will be cherished for years to come. 

What you choose to use as copywork is just as important as the writing itself.  Might I humbly suggest using prayers as copywork?  They help to solidify the faith in young hearts, teach grammar so eloquently, and the efforts and work toward perfecting their imitation teach patience, reverence and align young souls to many early saints including St. Thomas Aquinas and St. Jerome.

We offer many resources to help you in this endeavour.

 
Find a fairly large collection copywork worksheets including prayers (some are in English and some are in Latin), letters, number words, early reading words, saint quotes, and more.  Click Here to see our collection now.


Consider downloading some of our Learning Flashcards for prayers that can easily be printed and laminated for prayer card use.  These are always a favourite with children and they are perfect for CCD class use as well.  All cards can be printed out in grey scale if colour ink is an issue.  Click Here to see our learning cards now.


If you are looking for prayers for children that you can read online, you can find our online collection here with some of the most popular prayers for Catholic to know.  Click Here to visit that page now.


We also have printable versions of prayers for children.  These little sheets are perfect for CCD class use, to put in the front of folders, laminate for reference during family prayer time or to keep in a binder.  Many families and catechists really like these resources.  Click Here to see our prayer sheets now.


We hope you find these resources useful for your family or religious education class.


Blessings,

Kalei - That Resource Team