Family Prayer Project Helps Us Get Ready for November - The Month of the Holy Souls

Family prayer project helps us to remember that November is dedicated to the Church Expectant or Church Suffering.

Many years ago I bought a book at our parish mission from Tan Books.  It was tiny, cheap, and short so I figured I could finish reading it rather easily, so I bought it.  I was drawn to it by its title, "Read Me or Rue It" by Fr. Paul O'Sullivan.  How could I pass that by without wanting to know what was so important that one would give a book a title as strong as that?  It literally changed my life.  I began praying for the Holy Souls daily, learned about St. Gertrude and memorized the prayer our Lord shared with her.  The Holy Souls or Church Suffering have a very special place in my heart and our family prayer life.

Today I share one of my favourite prayer projects of the year.  It is called the Holy Souls Prayer Project.  This family project is designed to help children learn about love through praying for others especially those who can't help themselves.  One of the seven Spiritual Works of Mercy is to pray for the living and the dead. November is deemed the month dedicated to the Holy Souls. The poor souls in Purgatory need our help and you can be sure that they will remember us and pray for us in return as well. :)

This project is very simple.
Prayer Chart
Step 1: Print out the Prayer Chart to keep track of your family's prayers and the Holy Souls released through steadfast prayer throughout the month. This chart allows children to practice math skills as they see the great impact that their prayers have.  You may decided to use one chart per child or even one per family if that is easier. 

Click Here to download the Prayer Chart.

Prayer Sheets


Step 2: Pray the prayer dictated to St. Gertrude by our Lord Jesus Christ as often as possible throughout the month. St. Gertrude was told that each time this prayer is devoutly said, 1,000 souls are released from purgatory.  If not already committed to memory, you can print out the prayer to release the Holy Souls. You can print it out in a plain .PDF (2 per sheet) like at right or use Our Learning Card for the this prayer.

Click Here to download the prayer sheet pictured at right.
Click Here to download the Our Learning Card style prayer card.


Gift of Prayer Counters
Step 3: Pray daily and keep track of your prayers and souls for the entire month of November using the Holy Souls Prayer Chart for older learners and the Gift of Prayer Counters for younger learners. can cut out and affix the Gift of Prayer Counters to a door, wall, bulletin board or window frame to keep track of how many souls they have helped to Heaven.  It's that simple.

Click Here to download the Gift of Prayer Counters.


We have a few other resources that can help you in this project including prayer copywork and a saint mini-book to help learn about St. Gertrude.  Click the links to see those resources now.


Don't forget you can pray for the Holy Souls on any day, in any month as well so you can repeat this project as often as desired.

If you enjoyed this family project and would like to perhaps explore other family projects that we have click Here.

May God bless you and those you pray for.

Blessings,

Kalei - That Resource Team

Faith Lesson on Creation - Includes Acitivity & Poster, New Game and Matching F3 Piece


Who Made This? game
God is . . . The Creator
Today we offer a fun filled lesson on Creation as it is described in the book of Genesis in the Bible.  This lesson has three parts:

1. Finding out what your children already know about Creation
2. Sharing the account of Creation from the Bible
3. Recalling the facts and details

Begin the lesson by finding out what your learners already know about Creation. 

This is a perfect time for a family or class discussion.  This can take as much or as little time as needed.  You want to find out what the children already think about how the world got to be in existence.  Ask for the details that they can recall about this colossal event.

Share that God created the world out of nothing.  Explain that God created the world and everything good in it as it is one of His perfections (All Powerful) and also that He made everything to work in a most perfect way together as part of another one of His perfections (all Wise).  To help children figure out what God created and what man has made, play this very short but engaging game called, "Who Made This".  This game uses actual photographs of things and asks children to categorize who made it.  Each of the cards is numbered and an answer key is provided for quick reference.  Many important things are included in the pictures that children confuse as God created vs. man made like the rosary, the church, chalice, etc..  I have used it in a group and it worked perfectly.  You can always create two sets and have the game played in separate groups.  There are a total of 32 cards.


Share the account of Creation from the Bible.

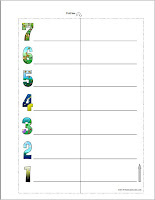
Download and build your Ladder of Creation poster before the lesson.  Simply print it out, fold and overlap the pieces, and tape together to create a five foot colour poster.  The ladder is noted with numbers to represent the different days of Creation.  Hang your ladder on the wall, bulletin board or door.  Print out and cut apart the Creation Ladder Word Pieces to go along with this activity.

Read out loud the account of Creation from the Bible or use an easier version that you may have or your DRE can recommend.  Have children tape the corresponding piece onto the ladder as they hear it mentioned in the account. If you are working with more than a few children, as in a CCD class, simply divide out the word pieces evenly amongst the children.  An answer card is included for quick reference.


Recall and solidify the facts.
Using our F3 piece to correspond with this lesson, learners cut and paste two pieces together to create a single flap that asks them to recall what happens on each day of creation.  The piece matches the theme of the lesson and can easily be added to their Catechism F3 Folder.  Instructions are provided on the piece.


Click Here to download the Who Made This? game.
Click Here to download the Ladder of Creation poster.
Click Here to download the Ladder of Creation word pieces.
Click Here to download the Ladder of Creation F3 piece.

I hope this lesson helps make your learning time more enjoyable.

Blessings,

Kalei - That Resource Team

F3 Pieces for Each of Elements and a New Idea for F3 Fans

Flip, Flap & Fold Pieces help bring the elements to life in a new easy to make notebook project.

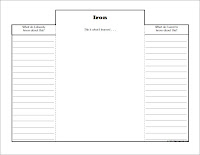
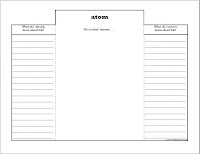
So I knew this request would be inevitably coming from my daughter, "Mom can you make an F3 piece for each of the elements of the periodic table?" And so it did yesterday.  I began working on the element pieces in the same style as the physics/chemistry term pieces as she requested.    They are simple to use and non-threatening.  They can help learners acknowledge information that they already know, think about what they still want to know about the element as well as note what they learn on their journey of discovery.  This CM inspired resource is far different than a fill in the blank worksheet in that children learn and create out of what inspires and moves from the material. But the question for me then became what to do with all the finished pieces??


I realized just how lovely these little pieces of paper grew to be in the hands of my child.  The joy that they inspired for a subject that was once met with apathy, disdain and at one point rebellion.  But what do we do with all of these pieces??  We didn't want to create a full F3 Folder for each one as that was way to daunting a task.  So we put our heads together and came up with this really great notebook project that anyone can make.  You really just need some cardstock, (coloured cardstock works great), two pieces of cardboard - even a cereal box will do, and something to bind it with.  We used a comb bind spine but you can also use a hole punch and insert rings, long twist ties, twine - anything really.  This project can be as simple or as fancy as you want it to be.

Sample pages from our scientific terms notebook.
Simply cut the cardstock in half (8.5"x5.5").  Use as many sheets as you desire.  Stack in a rainbow array of colours. Cut your two cardboard pieces slightly larger than the half sheets.  We added .25" to each side.  Bind at the shorter end using your method of preference and voila your notebook is ready.  Decorate the cover as desired.

As your learner completes the F3 element pieces they simply affix them to a page in their new notebook.  They fit absolutely perfectly for this project.  You may want to do what my daughter did which was to create a whole notebooks of scientific terms and info.  Just a thought.

The links below provide the files to specific element pieces.  Use as few or as many as you desire. 
Click Here to download the F3 Pieces for elements No. 1-25
Click Here to download the F3 Pieces for elements No. 26-50
Click Here to download the F3 Pieces for elements No. 51-75
Click Here to download the F3 Pieces for elements No. 76-100
Click Here to download the F3 Pieces for elements No. 101-118

We hope this inspires your child to learn about the elements in a fun and very engaging way.

Blessings,

Kalei - That Resource Team

A Few New Little Latin Resources

New worksheet and flash card manipulatives for a little Latin practice.

Today we offer some very useful resources from Michelle over at Thinking Love, No Twaddle for those of us studying Latin.  These resources correspond to chapters 21-23 of Getting Started With Latin by W. Linney but can be quite useful even if you are not using this specific program.  Flashcards help to solidify word meanings and appropriate endings which can be tricky, even for us bigger learners. :)  Michelle has also included a nice review worksheet that is simply yet very effective and fun.


Thanks so much Michelle for sharing your time and talents with us all!!

Click Here to download this Little Latin resource set.

Blessings,

That Resource Team

Notebooking Sheet for the Elements and Printable Periodic Table Posters

Notebooking Sheet and Posters help older learners explore the Elements and the Periodic Table

Chemistry and Physics have never really been my friends.  In fact, I never really enjoyed science until I was learning about Charlotte Mason's method and realized that science really was God's glory in action.  We now think of it from that perspective in our little homeschool and that makes us want to explore science in a more fun and natural way.  One of the ways to approach science is with notebooking.  Simply noting down what jumps out to you in your comprehension of information that has been read, heard, watched, observed, or studied in some other way.  Today we offer a special notebooking sheet designed by one of our daughters.  She wanted things just this way and so I copied her design and created this printable and a few little posters sheets for reference.

This notebooking sheet is fairly detailed and definitely geared for a bit older learners.  These sheets could be done one for each element but that is a huge undertaking.  A more realistic way to use it for elements are very abundant in our world.  Considering that 98.5% of the earth is made up of only 8 elements, we may all really want to consider exploring these elements a bit more in depth.  I learned this little statistical ditty in my reading of our CM selection, The Mystery of the Periodic Table by Benjamin D. Wiker. :) 

The posters are perfect for reference on a wall or to glue into a F3 folder, notebook, tablet, or other learning project.  If you are like us and using the book, The Elements by Theodore Gray, your learner could colour in the black and white version of the periodic table to match the one in the book.  Just a colourful thought. :)


We hope that these resources help you in your exploration of God's Glory in action.

Click Here to download the Element notebooking sheet.
Click Here to download the Periodic Table posters.

Blessings,

Kalei - That Resource Team

Science F3 Pieces to Help Young Scientists Discover the Fun of Physics and Chemistry

New F3 Pieces help learners grasp basic physics terms using writing and art skills.

As we continue to organize the study of the elements and periodic table in our own homeschool, we offer some new F3 pieces designed to help children discover some of the most basic terms used in physics and chemistry.  This first set includes the terms:  atom, matter, molecule, element, compound, solution, and mixture. These pieces are very versatile as they can be glued into a science notebook, a notebooking project, one of our F3 folders, or glued onto plain paper and then bound on the left hand side to make a book.  You may find yet another way to use them. :)  These graphic organizer styled pieces combine writing, art, comprehension, and fun.  Another plus for these pieces is that they can be used with whatever resources you have at home or can easily find at the library making them very flexible and cost effective. 

To use this resource simply print out the pages, cut apart pieces on the lines, fill in, fold and finish with artwork and a glue stick.  The detailed directions are included though you can really get a good idea of the finished piece with the picture above.


We hope that these pieces bring fun to your learning day and inspire your young scientist to learn even more about God's glory in action.

Click Here to download this new set of science F3 Pieces.

Blessings,

That Resource Team

New Science Big Book of Narration to Study the Periodic Table

New Big Book of Narration makes the study of the periodic table more meaningful.

Today we feature a resource for slightly older learners.  We are starting a unit on elements and the periodic table this week and we thought that we would share our science resources with you.  We will be using narration as part of the Charlotte Mason method of learning for our core activities.  The books we will be using are The Mystery of the Period Table by Benjamin D. Wiker, a Catholic professor and very solid science writer and The Elements - A Visual Exploration of Every Known Atom in the Universe by Theodore Gray.  The first book is on many CMers reading list and lends itself very nicely to narration.  The second is a wonderful and captivating book about the elements as many of us have probably never seen them.  You can read more about it HERE and see the few sample pages that really drew us to buy and use this book.  WOW!!  As we begin this science theme in our own homeschool, we share our core narration resource, the My Big Book of Narration for The Mystery of the Periodic Table by Benjamin Wiker with you today.

This new CM narration resource features a bit more space for narration in unique ways.  The usual space for drawing a picture and writing a few pages is included, but we have also provided spaces for Terms to Know, Neat Facts I Remember, and Questions or Thoughts That I Have.  These spaces really allow children to think about not only recalling detailed information but whole concepts that are being presented as well. 


To use this resource, simply print out the pages in order, fold them in half and bind on the left using a binding of choice including long duo-tangs, a comb-bind spine, rings, a small three ringed binder or any other way you may choose.  You can see our assembly instructions and collection of Big Books for Narration HERE.


Click Here to download this new narration resource now.

We hope this helps you in your science learning and we look forward to sharing more resources to accompany this unit very soon.

Blessings,

That Resource Team

New Timeline Resource

New timeline helps children learn about the order of just about anything you desire

From the creative mind of Michelle over at Thinking Love, No Twaddle comes this fun and easy to make printable timeline that allows learners to solidify content through pictures, quotes, thoughts, and more.  The timeline lines come in various colours and the simple pieces and arrows add charm and versatility to this project.

To use this resource, simply decide on the content you want to cover, print out the desired lines and pieces, cut them out and affix to a surface like a wall, poster board, a door, bulletin board or oversized 3-ringed binder.  Divide out your content by important points, and then note and affix your corresponding pieces to the timeline using the pieces provided or your own pictures or cards.


Timelines can be intimidating for many home learners, newbies and veterans alike.  Charlotte Mason method home learners are encouraged to begin using a timeline resource with their children to assist in the study of history by about the age of ten.  This resource takes the fear out of timelines as it can be used to study a number of subjects including a singular novel, an author's list of works by dates written, the Bible, the development of an invention such as the automobile, the biography of someone - including your child.

NOTE:  Learners can easily make a timeline about their own life and put it on their bedroom door, adding to it weekly, monthly or as events happen throughout the year.  :)  This can easily remind parents of activities that can be used for proof of learning for their own records of that of an formal education program like distance learning.  Timelines don't need to be fancy or big to relay the idea of the succession of events or ideas based on time.      

Thanks so much Michelle for sharing this resource with other homeschooling families.  May God bless you and your family always for all that you make and share with others!!

We hope this resource helps you and your children discover and learn about many new and exciting things together.


Click Here to download this timeline resource now.

Blessings,

That Resource Team


How Do I Serve? Card Games

Little cards make learning about servitude big learning fun

As we continue to learn about servitude and how we are all called to be servants of the Lord through serving each other, we created another little game that helps learn about servants in our community.  This is a great resource for use with a 'community workers' unit.  This game allows multiple types of play.  If you print out just one set, you can use it for a concentration style matching graphic with job title, playing "Serve With Love" which is a variation of old maid, or go fish as well.  If you print out two sets you can use it to play a larger game of concentration matching type games.  This resource allows for 1-4 players of the various games.

To use this resource, simply print out the file onto cardstock, cut apart on the lines, and begin using for fun play. 

Tip:  You can also print the file out on regular paper and cut apart and glue to an index card.  You can laminate your finished pieces for durability or longevity.

We hope this helps add fun to your learning day.

Click Here to download the How Do I Serve? Card Game

Blessings,

That Resource Team

New How Do I Serve? Art Narration Cards


New art narration sheets help children discern the value of servitude

When we were little children we often dreamed of what we were going to be when we grew up.  Depending on where you lived and your cultural background, you had a whole slew of ideas that probably changed as you grew older.  Most children are directed to be in careers that provide good incomes, comfort in life, and in some cases, prestige.  But as children of the Lord we know that we are put here to know, love, and serve Him and each other.  Period.  He doesn't specify our careers or how we are to serve except to say as He does in Matthew 25:34-46 that whatever we do for the least of our brothers that which we do for Him.  Today we offer resources that help children think about how each person serves one another through their chosen occupation.

These sheets directly correspond to the How do I Serve? Oversized Monthly Calendar which we shared yesterday.  As you discuss the daily occupation graphic from the calendar you can ask children about the importance of the occupation to the community at large and how that is connected to servitude of the Lord and others.  These sheets are colourful and simple to use for just about any age.  Simply print out the sheet, fill in and finish the picture using the graphic provided as a starting point.  When completed, have the children write about how the person is serving, what is going on in their picture, or reiterate a portion of your family discussion.  Fold in half and glue when completed.  Learners can then share with each other their finished cards.  You could bind all cards on the left with brads, half a file folder, key ring, or a spine of some sort to create a book of their writing and artwork for the month.  These are great for Charlotte Mason style learners beginning to use narration or those who need to show proof of learning in the form of writing samples.


There are three sets in this collection totally 31 different sheets.  We hope these sheets help stimulate some excellent Christian discussions.  Don't forget to look up the Bible verse mentioned above (Matthew 25:34-46) and read it together as a family.  :)

Click Here to download set 1 of How Do I Serve Art Narration Sheets - 10p.
Click Here to download set 2 of How Do I Serve Art Narration Sheets - 10p.
Click Here to download set 3 of How Do I Serve Art Narration Sheets - 11p.

If you enjoyed this activity you can see similar resources and samples HERE.

Blessings,

That Resource Team

New Resource Based on Servitude - How Do I Serve? Oversized Calendar

New bright oversized monthly wall calendar helps children to think about how that all jobs can serve the Lord.

I was inspired by the Gospel used during daily mass a few weeks ago (Luke 10:1-12) which spoke very clearly about servitude.  "The harvest is plentiful but the workers are few."  I was stirred to think about how everyone is called to serve not just the seventy that Christ chose.  I prompted me to think even more about how each person serves the Lord from the place they are at.  Every worker, every parent, every person is called to serve our Lord in some unique way.

Today I offer this new oversized monthly wall calendar.  This is question game style calendar that asks the question daily: " How do I serve?"  Using the daily graphic as a starting point, great little discussions can follow about how each person can serve our Lord through serving each other in their daily occupation.  This set can be used year round with its colourful monthly header as well as the other corresponding decorations.  I have even included two Bible passages that could be discussed when using this resource.


To use this resource, simply print out the pages (cardstock works best), cut apart pieces on the lines, and affix to a large poster template that you can easily make using standard poster-board or a bulletin board.  See HERE for a photo sample of template and template instructions as well as to see our entire collection of interactive calendars.

This resource is the first in a series dedicated to the idea of servitude.  Visit us tomorrow for another corresponding resource.

Click Here to download the How do I Serve? Oversized Wall Calendar

Blessings,

Kalei - That Resource Team

New Saint Trading Cards Are Now Available

New saint trading cards feature four modern saints.

As we finally get into the swing of things this week, we offer new printable trading cards featuring some modern saints.  We generally just make things that our family will use when we get inspired to do so or in our own timing but we got a beautiful request that we just couldn't resist.  A very nice Catholic mum e-mailed us asking if we would consider making some saint cards that highlighted more modern saints and blessed that could be used for Halloween trick or treats, church actives and All Saints' Day parties too, we might add.  These are great to reinforce information and lessons for Catholic but they can also be a solid evangilization tool as well.

Today we offer four new printable saint trading collector card sheets featuring: St. Padre Pio, Bl. Mother Teresa of Calcutta, St. Maximilian Kolbe, and St. Maria Goretti. 


These cards come four to a page and are easy to make.  Simply print out, cut apart, fold in half, and glue together.  We always laminate our cards for longevity.  We also punch a hole in them to affix them to a ring like pictured below.  These cards are also perfect CCD classes, classrooms or even just for jobs well done.  Our children love collecting these! 


Click Here to get the card for St. Padre Pio
Click Here to get the card for Bl. Mother Teresa
Click Here to get the card for St. Maria Goretti
Click Here to get the card for St. Maximilian Kolbe


We hope that these little resource cards help bring our holy heroes, the saints, to life for your learners.

Blessings,

That Resource Team

Catechism Lesson on The Trinity - Includes F3 Pieces, Copywork, Mini-books and More

Help children begin to understand the Trinity with simple and fun resources.

 
In our last lesson we discussed and tried to help our children understand the Perfections of God.  In this lesson we begin to think and talk about the Holy Trinity.  The Trinity is very difficult for children to understand fully.  Why?  Because it is a hard concept for adults to understand fully as well.  The Catechism of the Catholic Church (CCC: 202) explains the Trinity in this way:
Jesus himself affirms that God is "the one Lord" whom you must love "with all your heart, and with all your soul, and with all your mind, and with all your strength". At the same time Jesus gives us to understand that he himself is "the Lord". To confess that Jesus is Lord is distinctive of Christian faith. This is not contrary to belief in the One God. Nor does believing in the Holy Spirit as "Lord and giver of life" introduce any division into the One God:
We firmly believe and confess without reservation that there is only one true God, eternal infinite (immensus) and unchangeable, incomprehensible, almighty and ineffable, the Father and the Son and the Holy Spirit; three persons indeed, but one essence, substance or nature entirely simple.

 
Having used this and the Bible scripture passage Genesis 1:26-27 as the inspiration, I have put together this lesson using a variety of fun resources.  I will share them below and leave the dialogue to you and your children.  The instructions for the F3 Activity are included in the file.  All other resources are listed below.

 
Supplies
.PDF Files below
Scissors
Glue
Stapler
pencil
Art mediums, if desired for illustrating your mini-book

 
Suggested Files
Click Here for F3 Trinity Activity (3p)
Click Here for My Book Mini-book The Trinity - prompted (2p)
Click Here for My Book Mini-book The Trinity - plain (2p)
Click Here for 10 Words About the Trinity - Trace copywork in print (1p)
Click Here for 10 Words About the Trinity - Trace copywork in cursive (1p)
Click Here for Sign of the Cross Prayer - Trace copywork in print (2p)
Click Here for Sign of the Cross Prayer - Trace copywork in cursive (2p)

 
Step One
Print out F3 piece.  Directions are included on the sheet.  Cut out pieces on dotted lines.  Fold flaps toward the centre on black lines.  Glue appropriate description to the corresponding flap.  Glue to F3 activity sheet called: The Holy Trinity, included in the file.  Share and discuss the piece. 

 
Step Two
Read the Bible passage from the F3 Activity sheet and discuss together as it applies to the Trinity. 


Step Three
Have the learners complete the My Book Mini-book - The Trinity.  This is available in two styles.  There is a blank book for older learners and a prompted style book for younger learners.  Simply have children complete the pages, cut apart on the lines, stack and staple.  It is easy and a fun way to narrate back information or show proof of learning.  This little book asks students to complete the following tasks or questions: 

Who or what is the Trinity?
Write or draw about the first person of the Trinity. 
Write or draw about the second person of the Trinity. 
Write or draw about the third person of the Trinity. 
Write out the sign of the cross prayer. 
Draw a symbol of the Trinity.

 
In a formal class setting, this could be started in class and finished for homework if time is an issue.  When completed, have children glue this onto their F3 Activity sheet in the appropriate spot.  I use card stock for the activity sheets to support the flaps and pieces better but that is up to you.

 
Step Four
You may want to have younger learners use some of our copywork sheets to solidify the uniqueness of the Trinity.  We offer these worksheet resources:

 10 Words About the Trinity.  These trace copywork sheets are available in both print and cursive styles.

 The Sign of the Cross Prayer.  These trace sheets help children learn one of the most basic prayers of the Catholic faith.

  
Step Five
You may want to finish up your lesson on the Trinity with our science experiment on the 3 states of water as they could be related to the Trinity.  We have previously posted about that here

 
**As a little note, we understand that what we have shared is not a perfect example of God, nor is a shamrock, three lit candles, or a triangle a perfect illustration as nothing is perfect but God.  But these symbols help children to begin to understand the concept of one God in three distinct and separate persons.

 
We hope this helps the religious education of your children in some way. :)

 
Blessings,

That Resource Team

Let Your Fall Decorations Call You to Prayer

Fall decorations remind us to pray for one another

Fall signals the beginning of the hustle and bustle that is to come over the next three months.  We count our blessings as we are usually already in need and calling for more things - more time, more talent, more treasure, more teaching.  We can easily feel overwhelmed by all the tasks that we set up for ourselves to accomplish.  There is so much to do, prepare for, buy, cook, create, teach . . . and . . . remember in prayer.  We created this easy and inexpensive family prayer project to help us and our family stay focused on God's will and not our own.  It is to remind us to offer our daily vocation, "All for You, Lord."

You will need:
  • Washable tempera paint in fall colours - orange, green, red, yellow
  • Sheets of white paper - the larger the better.  Newspaper end-rolls work well.
  • Scissors
  • Removable scotch or painters tape
  • Washable black, fat marker
  • Fat tipped gold marker
Apply paint in blobs to the paper.  Using falling leaves as inspiration, have children finger paint until the desired fall effect is reached.  Then let the paper dry very well.  Our project used two large table sized sheets of paper as pictured here. 


Using the black washable marker, trace your child's hands spread out as shown in the picture on the darkest parts of your picture.  This will represent a dried Maple leaf.  Trace hands with fingers close together on the lightest parts of your artwork to represent an Elm leaf. 


Cut apart leaves using scissors.  Children can easily do this part.  The more helpers you have, the faster the cutting goes.  Don't worry about perfection, it's about the fun and time spent together.


Next, think about the people in your life that have asked for prayers or are in need of prayers.  Think of the ill, the less fortunate, relatives, ministry workers, other homeschooling families, and don't forget your pastor and the Holy Souls in Purgatory.  Write one intention on each of the Elm leaves. 

Turn leaves over and affix tape loops to the back of the leaves.   


Place the dark, Maple leaves in place first on your wall.  We recommend using a very high traffic area such as your kitchen or your learning area.  Then place the Elm leaves with the golden intentions over top of the Maple leaves.


As you pass by or gather for meals, remember to pray for those golden intentions.  Keep these up until Advent and add additional leaves as needed.

Don't let the festivities and busy-ness of the up coming holidays and seasons change your family focus.  Keep it in your heart to focus on your vocation and simply offer - All for You, Lord!!

Blessings,

That Resource Team